 Split Print
Print a PDF across 2 or 4 pages on Mac
To spread one PDF page across several sheets, you need a tiled layout. Split Print prepares two sheets side by side, two stacked sheets, or a four-sheet grid. For four sheets per PDF page, choose the 2×2 grid. Choose the paper in your printer, inspect the overlap in the preview, then print and join the sheets by hand.
This guide is for a poster, illustration or photo whose finished size can change. Split Print fits the source to the selected sheets. For a sewing pattern or technical drawing that must retain its original physical dimensions, use a workflow that explicitly preserves scale and check a printed reference measurement.
Choose a layout before you print
Start with a PDF or a JPG, HEIC or PNG image. You will also need a Mac running macOS 15 or later, a printer set up on that Mac, matching paper, and scissors or a ruler for folding and joining the sheets.
The three layouts divide each source page differently:
| Layout | Sheets per source page | Division |
|---|---|---|
| Side by side | 2 | Left half and right half |
| Stacked | 2 | Top half and bottom half |
| 2×2 grid | 4 | Top-left, top-right, bottom-left, bottom-right |
Try side by side for a wide composition and stacked for a tall one. Use the grid when you want the source spread over four sheets. Compare the previews before deciding; the source proportions and overlap affect the fit.
Two important limits: Split Print offers these three layouts, and it does not set an exact finished poster width or height. A four-sheet layout also does not guarantee a particular named poster size after fitting and joining.
Before choosing your layout, use the poster size calculator to estimate the joined image area for two or four A4, A3 or Letter sheets. Compare paper sizes with your own margin and overlap assumptions. The estimate is a planning aid, not a preview of Split Print's output.
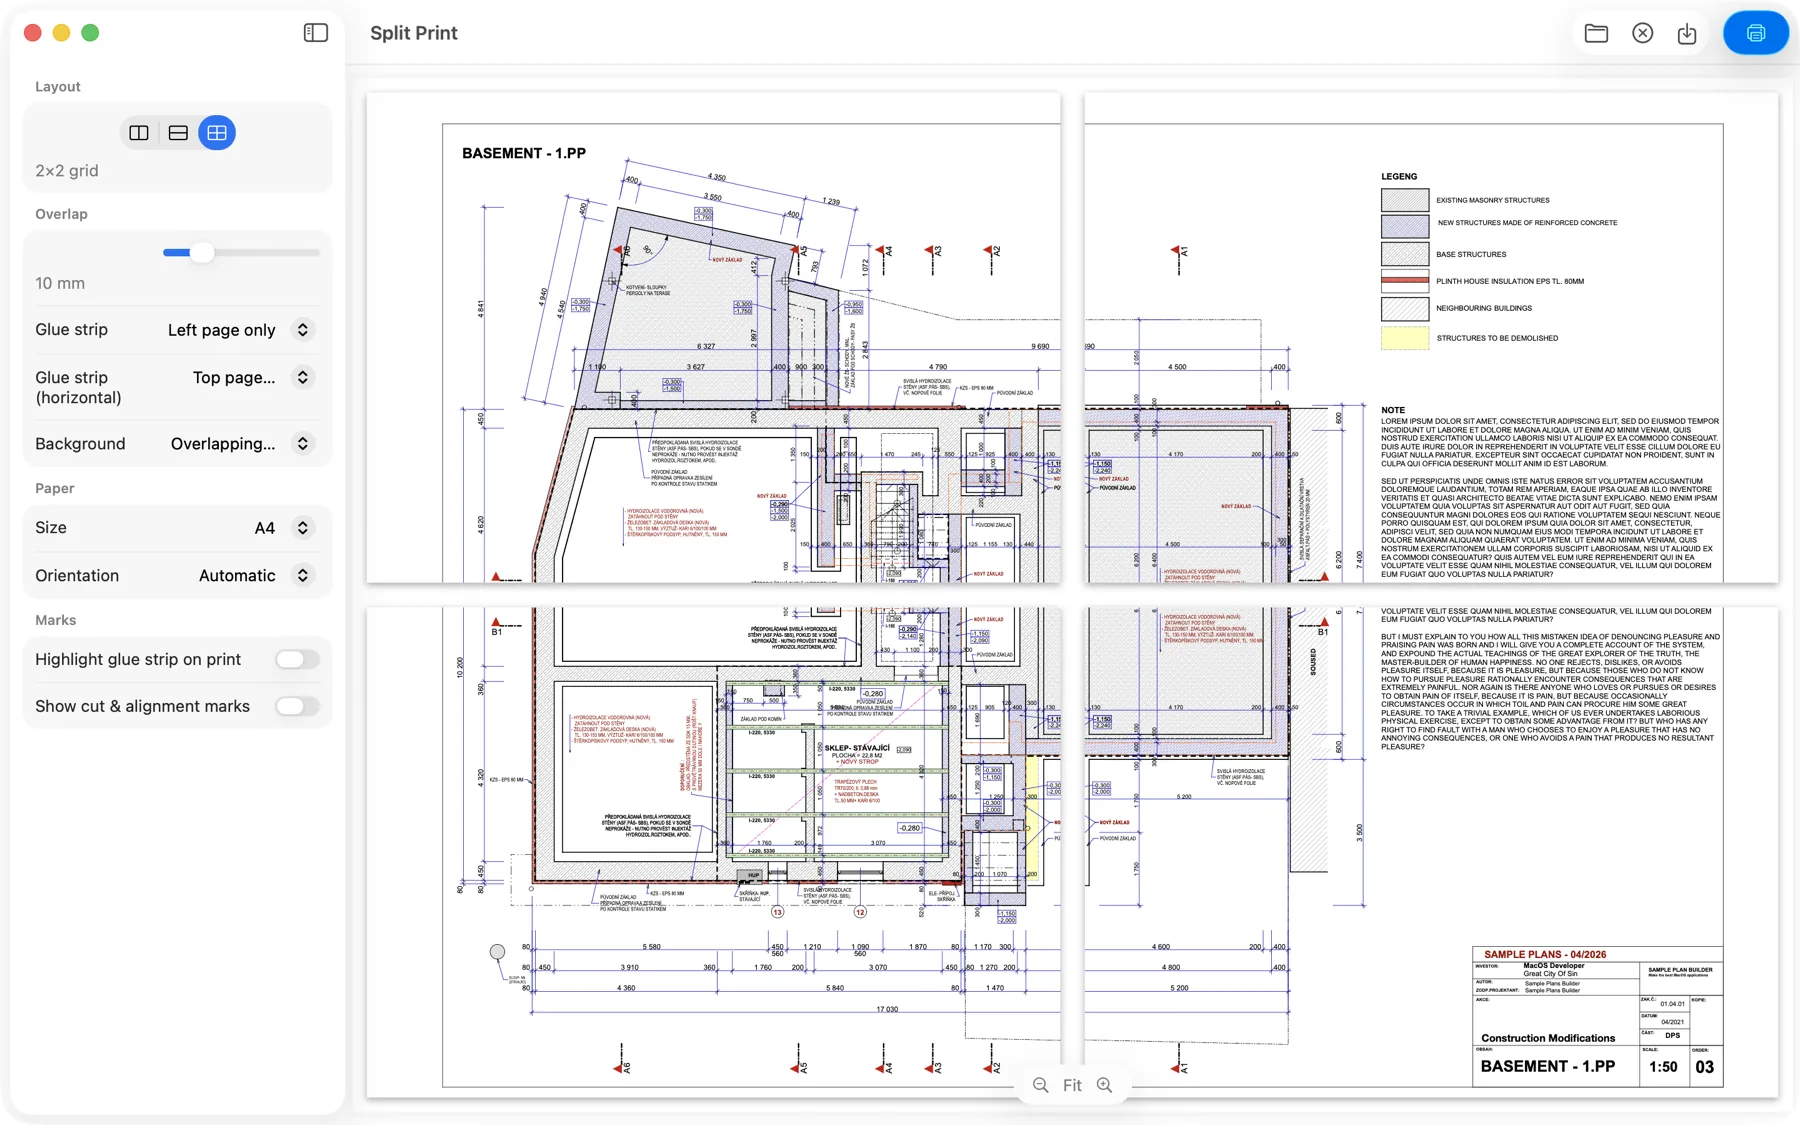
1. Open the source PDF or photo
Drag the file into Split Print or use Open. Export PDF includes every source page. Print prepares the whole tiled document for the Mac print dialog, where you can select which output pages to print if the dialog offers page-range controls. A three-page PDF produces six output pages in either two-sheet layout, or twelve in the grid layout.
For a photo, choose the original file rather than a small screenshot. Inspect the preview for fine text and image detail before committing paper and ink.
2. Match the paper and arrangement
Under Layout, choose the side-by-side, stacked or grid icon. The caption below confirms the selected layout. Under Paper, select A4, A3 or Letter to match the paper you will load.
Start with Automatic orientation, which chooses the paper orientation that makes the tiles largest while keeping them at the same scale. Compare Portrait and Landscape if needed. All tiles of one source page use the same scale so their image details can line up.
The application fits the source onto the selected paper. It can enlarge or reduce it, so these settings do not preserve the original PDF dimensions at 1:1.
3. Set the overlap and glue strip
The overlap repeats a band of the image around a join. That gives you matching detail to compare when laying the sheets together.
Split Print starts with an Overlap setting of 10 mm; the control ranges from 0 to 50 mm. Check the band in the preview after changing the layout. The setting is applied to the source before fitting, so the physical width of the printed band can change with the fit.
Choose which page carries the Glue strip. Side-by-side layouts offer left, right or both pages. Stacked layouts offer top, bottom or both. The grid has controls for both directions.
Under Background, Overlapping content keeps the image in the band. White strip blanks the designated glue strip. For a first attempt, keep overlapping content so you can compare repeated image details at the join.
4. Inspect the joins and optional marks
Turn on Show cut & alignment marks if you want guides on the output. Highlight glue strip on print adds a visible tint to the designated band; leave it off if you do not want that tint in your poster.
Inspect every tile of the selected source page. Look for a join through a face, small text or an important line. Check whether the band gives you enough detail to align the sheets.
Paper size and printable area are different. Some printers leave an unprinted edge, and Split Print places the image's joining edges at the paper edges. Check a pair of neighboring sheets before printing the whole document. Apple's macOS 15 printing guide explains that clipped text can result from a conflict between the page margins and the printer's nonprintable area.
5. Export a PDF or open the print dialog
Choose Export PDF to save all the prepared sheets for later. Choose Print to open the Mac print dialog.
Check that the dialog uses the same paper size and orientation as your layout. Print one output page per sheet with double-sided printing off. When printing the exported PDF, begin at 100% scale on matching paper and inspect a test pair. Applying another fit operation changes the prepared layout's scale.
For the first source page, print output pages 1–2 to test a two-sheet layout. In the grid layout, pages 1–2 test the join between the two upper tiles; print pages 1–4 to check both directions before printing the rest. Page-range controls vary with the app and printer. If they are unavailable in the direct print dialog, export the PDF and look for page selection in the app you use to print it.
If the printer clips the joining detail at that setting, stop and check its supported printable area and borderless options. Changing print scaling may alter the fit and joins; test the new settings before printing the complete set.
If an Epson borderless print comes out slightly enlarged, check the Epson Expansion setting before reprinting the full set.
The output pages are already tiles. They should not be tiled again by another poster-print setting.
6. Line up a test seam, then join the sheets
Lay neighboring sheets in their intended positions. For a grid, the output order is top-left, top-right, bottom-left, bottom-right for each source page.
Compare the repeated image detail at a join. Fold or trim the edge that would cover the neighboring image, while keeping the strip you need for attachment. Align the detail before applying glue or tape. Check the next join before fastening it.
If a line disappears into an unprinted margin or the details do not align, revisit the preview and print settings. Finish the full set once the test seam works for your printer and paper.
When you need a different tiling workflow
Use a workflow with explicit scale control when printing a measured plan or pattern. You will also need another approach for a poster requiring more than four sheets per source page or a precise finished dimension.
Adobe documents a Poster printing option with a tile-scale percentage, overlap and cut marks. In Acrobat, open the PDF, choose Print, then select Poster under Page Sizing & Handling. Adjust Tile Scale and Overlap while checking the preview. Measure a test print when dimensions matter.
For a two-sheet or four-sheet poster, Split Print brings the layout, glue-strip controls and PDF export into one Mac app. See Split Print on the Mac App Store, or compare its layouts and screenshots before preparing your file.
Questions before your first print
Can I print a photo instead of a PDF?
Yes. Split Print opens JPG, HEIC and PNG images as well as PDF files. The same layout and glue-strip controls apply.
Does a four-sheet layout mean four pages for the whole PDF?
It means four output sheets for each source page. A two-page PDF produces eight output pages in the grid layout.
Will a sewing pattern stay at its original size?
Split Print fits the source to the chosen paper and layout. Choose a workflow with explicit physical scale preservation for a pattern, and verify its reference square before using it.
Can I save the prepared sheets and print later?
Yes. Export PDF saves the whole tiled document. Keep the same paper size when printing it later and check a test pair before assembling the poster.